Archives
- Newer posts
- April 2026
- November 2025
- October 2025
- September 2025
- August 2025
- July 2025
- June 2025
- May 2025
- November 2024
- April 2024
- November 2023
- October 2023
- August 2023
- May 2023
- February 2023
- October 2022
- August 2022
- July 2022
- May 2022
- April 2022
- March 2022
- February 2022
- June 2020
- March 2020
- February 2020
- January 2020
- December 2019
- November 2019
- October 2019
- September 2019
- August 2019
- July 2019
- June 2019
- May 2019
- April 2019
- March 2019
- February 2019
- January 2019
- December 2018
- November 2018
- October 2018
- September 2018
- August 2018
- July 2018
- June 2018
- May 2018
- April 2018
- March 2018
- February 2018
- January 2018
- December 2017
- November 2017
- October 2017
- September 2017
- August 2017
- July 2017
- June 2017
- May 2017
- April 2017
- March 2017
- February 2017
- January 2017
- August 2016
- June 2016
- April 2016
- March 2016
- February 2016
- January 2016
- July 2015
- June 2015
- Older posts

Creating an E-Commerce site using WordPress
WordPress is a Content Management System originally developed for bloggers to post blogs. It is Open-Source, which means it is freely available to build your own blog posts sites. As years passed, it was upgraded to develop e-commerce websites and to support e-commerce plugins. There are several themes which are suitable for e-commerce sites. Also, it has a large number of plugins for the e-commerce platform that makes development tasks easier.
Here are some easy steps I recommend you can follow to develop a basic e-commerce site.
Firstly, figure out for which type of the products the website needs to be developed. Select the theme which suits your design requirements. Or else, you can create a custom theme as per your requirements. The next step is to search for a plugin which will help you to set up your online store. One of the most popular plugins WordPress uses to build a full fledged e-commerce website is ‘WooCommerce’.
WooCommerce
WooCommerce is one of the ways in which you can build a WordPress website into a full-fledged e-commerce store. It is free and the most popular open-source plugin of WordPress which helps in setting up an online store with ease. It also takes less time to build.
When you install and activate WooCommerce for the first time, it will take you to a setup wizard which shows sections like
- Store Setup: to add store base location, address, currency to use and product type.
- Payment: to allow payment methods for the customers
- Shipping: to fix the shipping rates.
- Extras: provides extra services from WooCommerce for your store like Storefront theme, Automated taxes.
- Activate: provides to connect your store with Jetpack to enable extra features.
- Ready: last section to finish store setup. Also displays option to create or import products from existing store.
Store setup
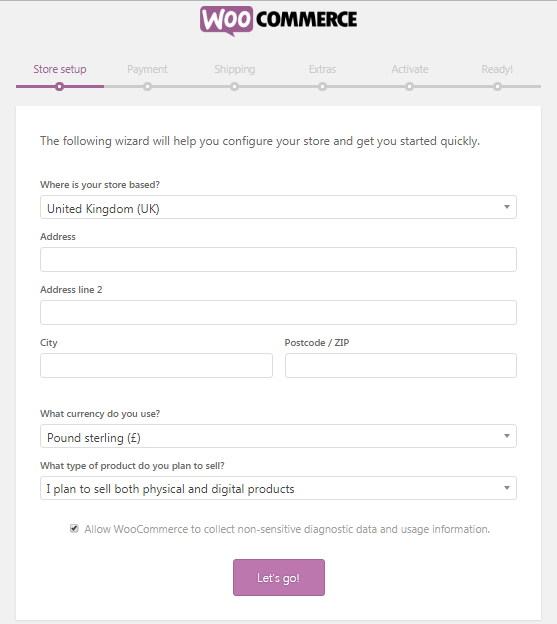
This first section asks for where the store is exactly located, with a list of country names along with their state names. You have to specify the currency which you want to use and type of products you want to sell on your store. The product type can be either physical products, digital products or both product types.
Payment section

The payment section is the second section. It will display the payment methods available at your store location. This may vary based on what location you have mentioned at the previous section. If you select store base location as India, then you will have PayPal and PayPal Standard mode of online payments.
It also offers offline payment methods such as Cheque Payment, Bank Transfer and Cash on Delivery. Once you enable the appropriate payment method for your store, click ‘Continue’ to proceed to the Shipping section.
Shipping section
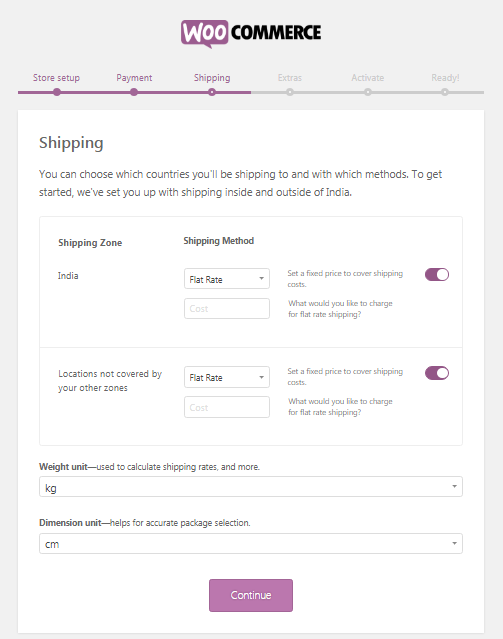
In the Shipping section, it provides a special option for the store base location of US or Canada. If your store is in one of those countries, you will have the option to select live shipping rates based on the type of the product.
If your store base location is other then US or Australia, you can set the Flat Rate or Free Shipping option from the drop down.
Also you must choose the weight and dimension for how you want to measure the product. Once you are done with setting up shipping details, click ‘Continue’ button to proceed to the Extras section.
Extras section
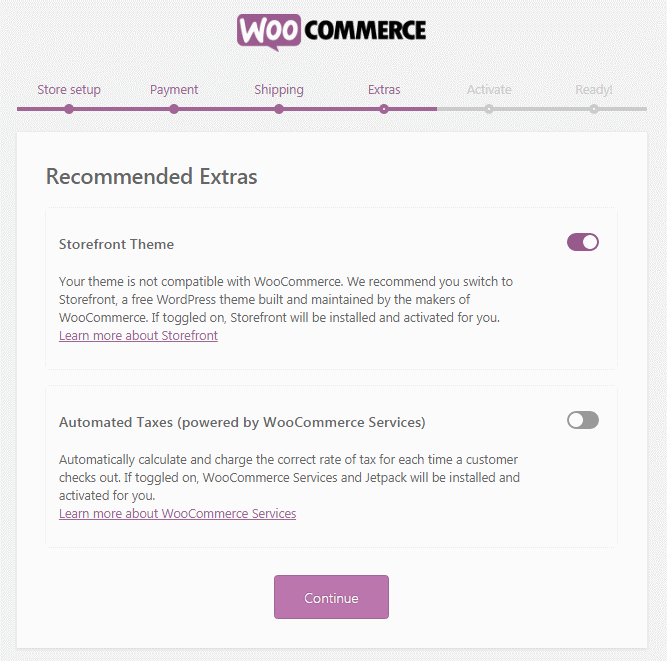
The Extras section has a Storefront theme option, which if enabled it will install Storefront theme of WooCommerce service. This allows you to add plenty of extensions and child themes to make your store look awesome. There is one more option called Automated tax rates which gets displayed depending on the store base location. This WooCommerce service fixes the tax rate of the product automatically. After enabling WooCommerce extra services, click ‘Continue’ button. That will redirect you to the Activate section.
Activate section
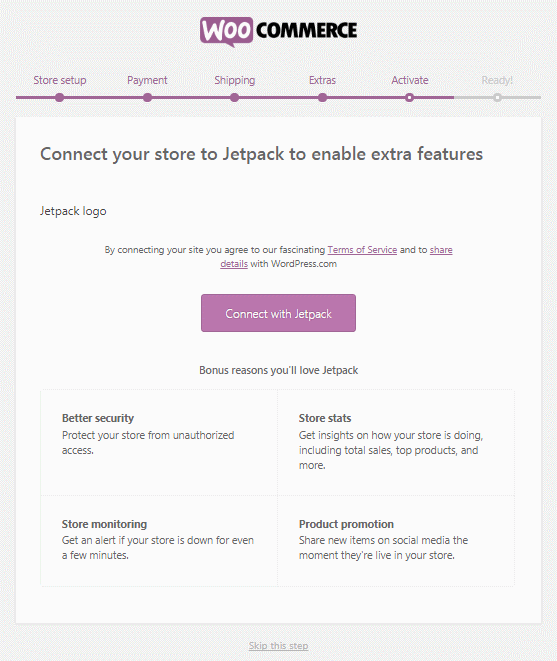
In Activate section, you get the feature to connect your store to Jetpack to enable all the WooCommerce services and functionality which comes with the Jetpack. If you don’t want to connect with Jetpack, you can skip this section by clicking ‘Skip this step’ link.
Your store is ready
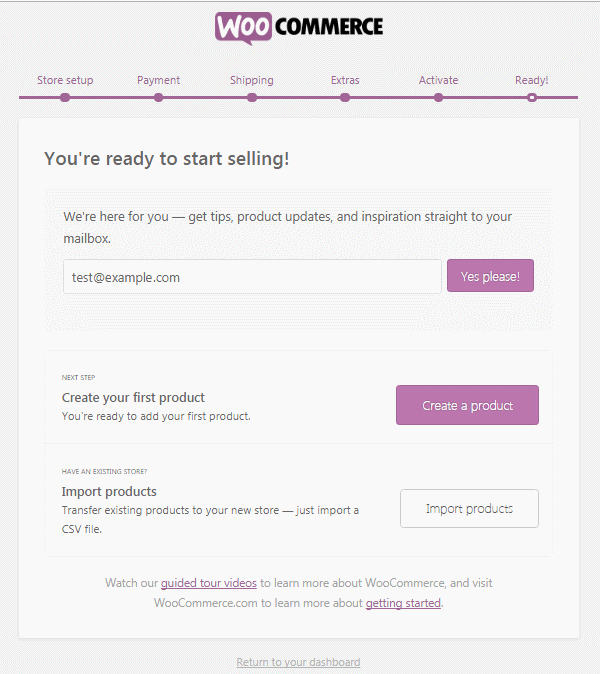
Now your store is ready to go live! Don’t forget to add your email to get support from WooCommerce. You can also create products right from here or if you have an existing store, you can import the products through Product CSV files.
Finally if you don’t want to create your product at this stage, you can return back to your dashboard by clicking the below ‘Return to your dashboard’ link.
Add Products options
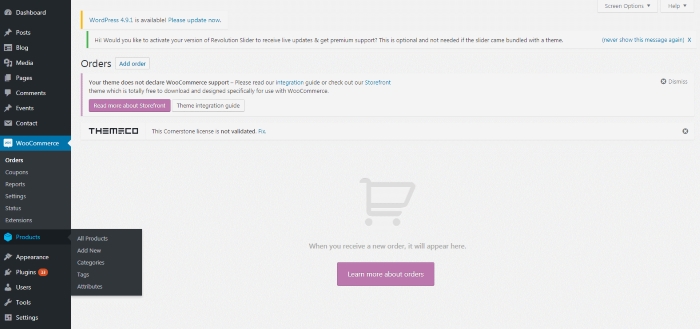
Now you will see the WooCommerce Add Products options in admin panel of your dashboard. If you have connected to Jetpack, additional Jetpack option will be displayed.
In WooCommerce option you can access the WooCommerce features such as Orders, Coupons, Reports, Settings and Extensions.
Product option is where you can add new products and manage all products. it also provides a feature to add product categories and tags for products.